

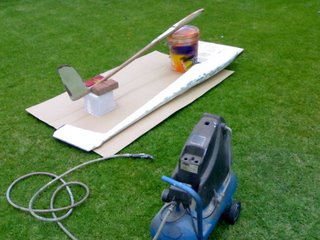
So the weekend has arrived , a good time to spray outdoors in good light, by now the epoxy coated plug has been waterpapered to a smooth finish, and most of the hollows and bumps taken care of. The materials are shown on the left as follows, a glass bottle to mix paint in, in this case 2 x paint to 1 x harderner , always wear gloves the harderner contains isocyanate a cyanide based compound not good for you. Your favourite spray gun , I like the gravity feed touch up gun shown, some mixing sticks, 2k or lacquer thinners and a good mask of course.
Spray in a well ventilated area if it looks like rain or there is moisture about, it could give poor results, altough these are not final coats , remember to build up layers smoothly and evenly.
 The 2k with a fast harderner will flash of in about 15 minutes, so I alternate between 2 or more projects ,that need sraying in this case VENTUS 2CX, while one is drying the other is being srayed. Tip mix the 2k properly and let stand for a few minutes, then mix in thinners about 20 percent so that it drips off the mixing stick like water, then spray, if it is still to runny let it stand a while longer, an orange peel effect comes from to little pressure or not enough thinner.
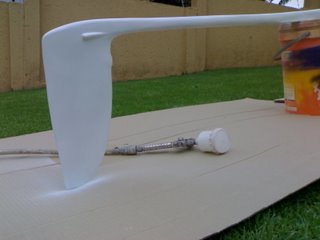
If you are going to add finishing touches like the streamlined shroud for the rudder control, mould it on with body filler sand to shape prior to spraying, remember all shapes need to be smooth ,and be able to release from a mould.
The results are now very pleasing but still require another round of wet sanding now with 600 grit and a final coat which will be polished prior to moulding , remember this plug will be accurately reproduced so if you are not happy with the finish keep working on it, it is 90 percent perspiration and 10 percent inspiration, next we start preparing the wing .

No comments:
Post a Comment