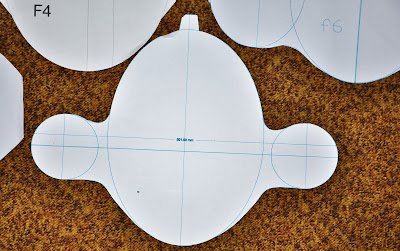
The 1/72 scale Airfix kit that I build in Part 1 and Part 2 provided me with a lot of information but did not include a much needed front view of the buccaneer. I had to revert back to a Google search to find a drawing that contained cross sections of the fuselage. With the aid of this drawing I then scaled the 13 formers to I/7th scale that I required. Six of the Formers (where the jet engines are situated) were too big to print on a normal A4 (unless you tile them) printer and I had them plotted by my brother on his A2 plotter.
After cutting them out and pasting it on thin Formica I will cut and shape those to the outlines of the plotted formers to make up templates for my hot wire foam cutter. Up to yesterday I managed to do 5 of the smaller formers with the bigger 8 still to be done. Once all the formers are done I will order the foam and proceed cutting it, building up the fuse in sections as per Formers 1 to 13.
This technique differs somewhat from the top view /side view approach and may require more work but I think that I will end up with a more accurate / symmetrical fuselage especially more so because of the complex curves of the buccaneer’s fuselage.
For now I am happy with progress and I am including some pictures of the build as up to this date.
I don’t know when I will make the next posting and therefore would like to this opportunity to whish all the BERG Blog readers a Merry Christmas and a happy new year (2011)-May all your landings be good ones.


2 comments:
Hi Piet,
For limited use templates, I have found that model card (like 500gram cardboard), with edges CA'd sanded using 1200 grain wet 'n dry, is far easier to work with than formica, which cracks due to ultra violet radiation & the flapping of butterfly wings (I.e. no reason).
regards,
Tigger
Oi! Piet! Hoe kom hierdie projek aan....? :)
Moenie dat jou 2.5 XC Tsotsi al jou tyd in beslag neem nie... :) Die GEMS PSS is om die draai!
Cheers,
Izak
Post a Comment