Because this Blog is updated regularly it is a good idea to visit at least once a week so as not to miss anything. If however you are not a regular visitor, please use the archive links, at the bottom of the side bar on the right, to view postings that have moved off the main page. Or type a key word in the search block in the black bar at the top left and click on "SEARCH BLOG" and it will take you to the posting within our Blog. (For instance, type "Jart" and all the post that mention Jart will open) The Label at the bottom of a post can also be used. Click to get all posts with the same label together!
This BLOG is best viewed at a screen resolution of 1024x768. Click here to get instructions on how to adjust your monitor to these settings.


Friday, December 22, 2006

THE HEAT IS ON.

Its a neck and neck race , both B.E.R.G. model glider development programs are moving along at the same pace ,rather hectic.
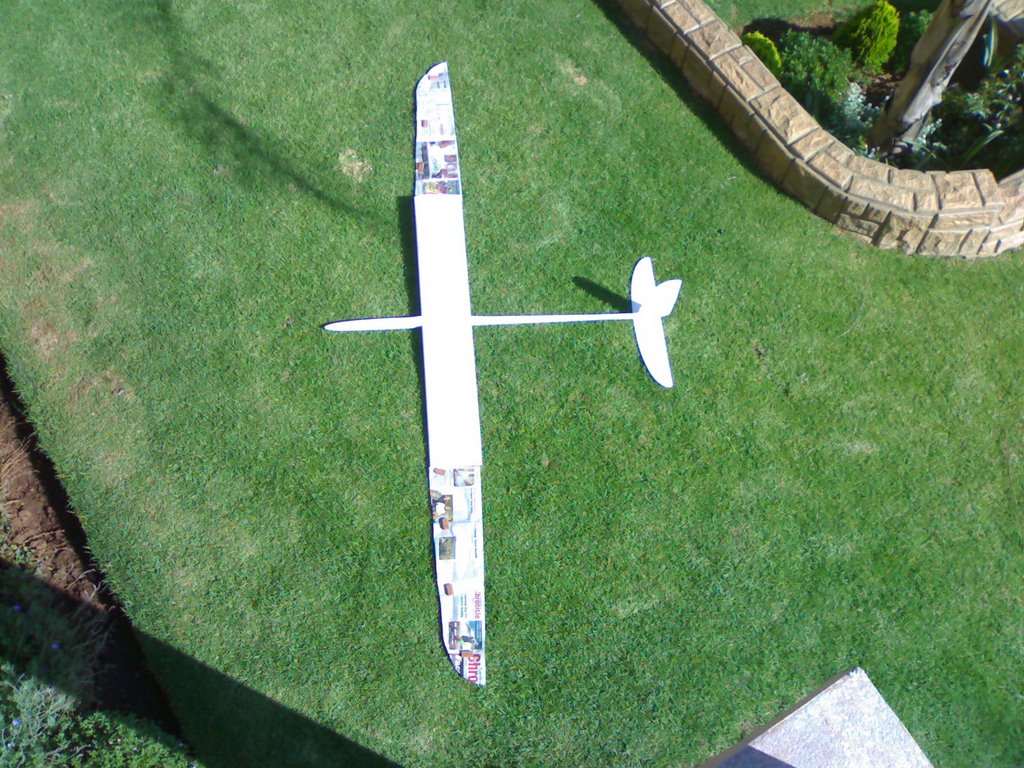
The reason is that the next season starts early January and it would be great to fly these new creations and see how they do.They need to be completed fitted out and trimmed before the competitions start. Below there are some more photos of the secretive EMOYENE build similar in many ways to the STILLETO but here and there some clever techniques thrown in, check out these .


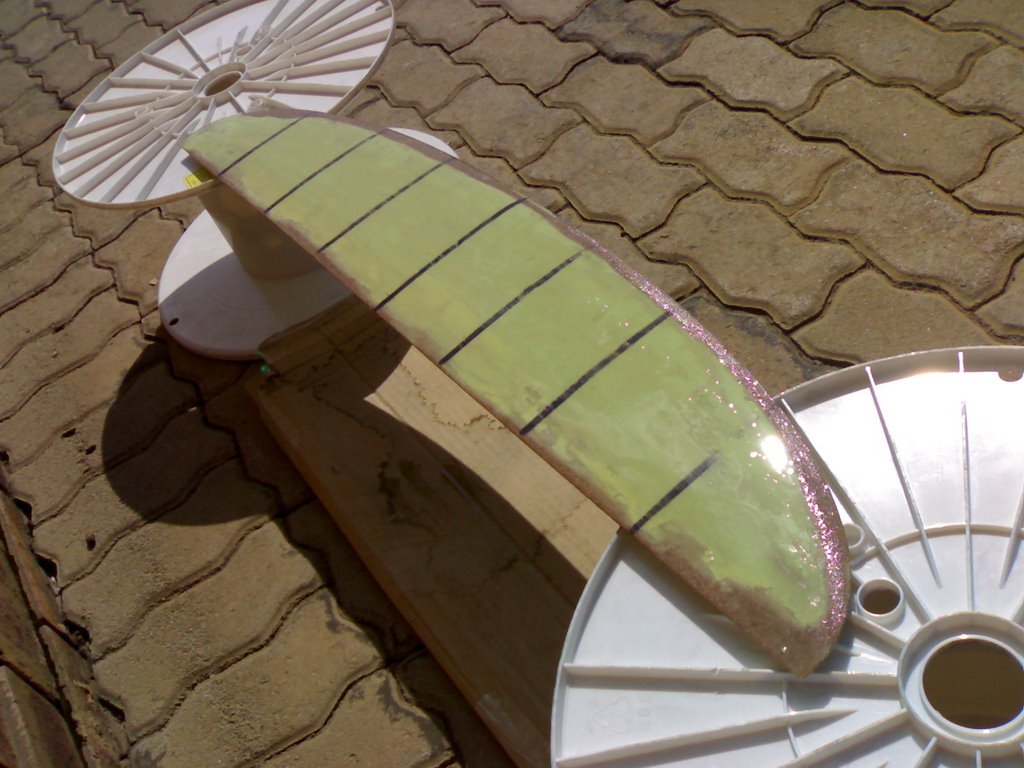
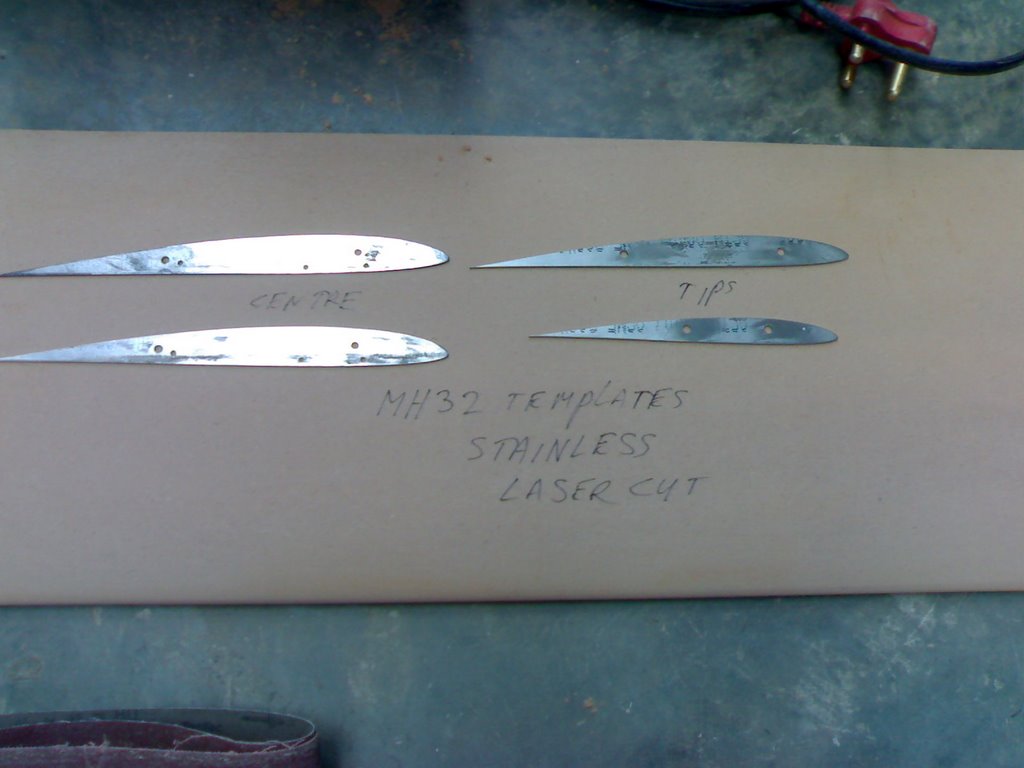
Accuracy plays a big part in getting a good result.


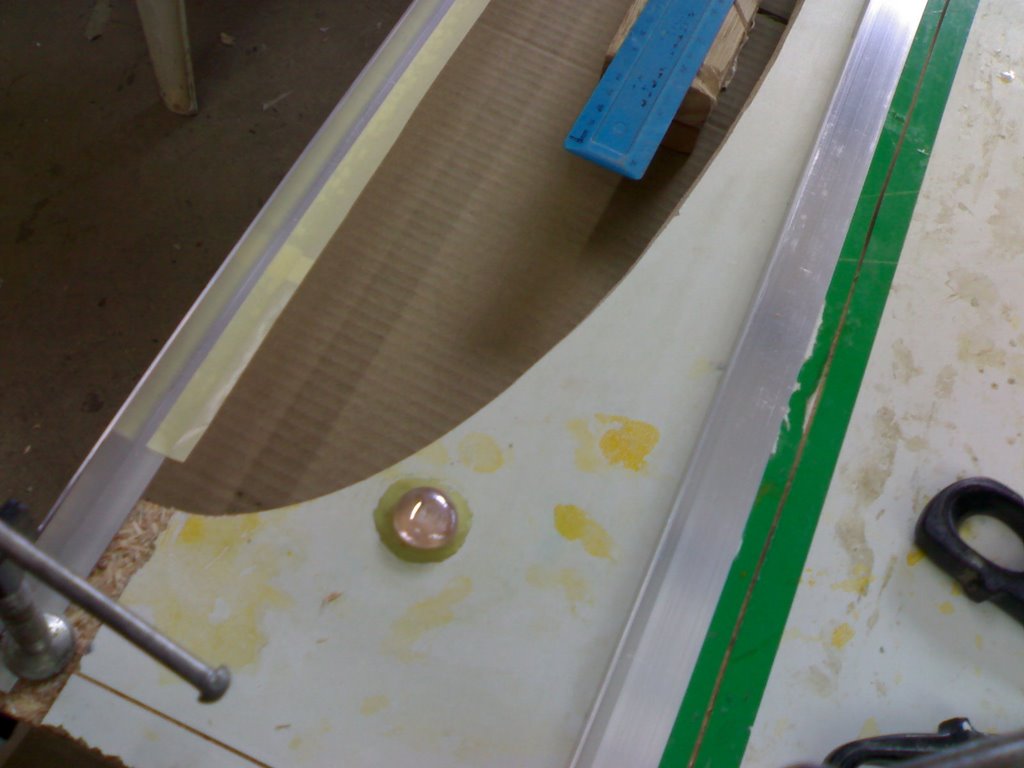
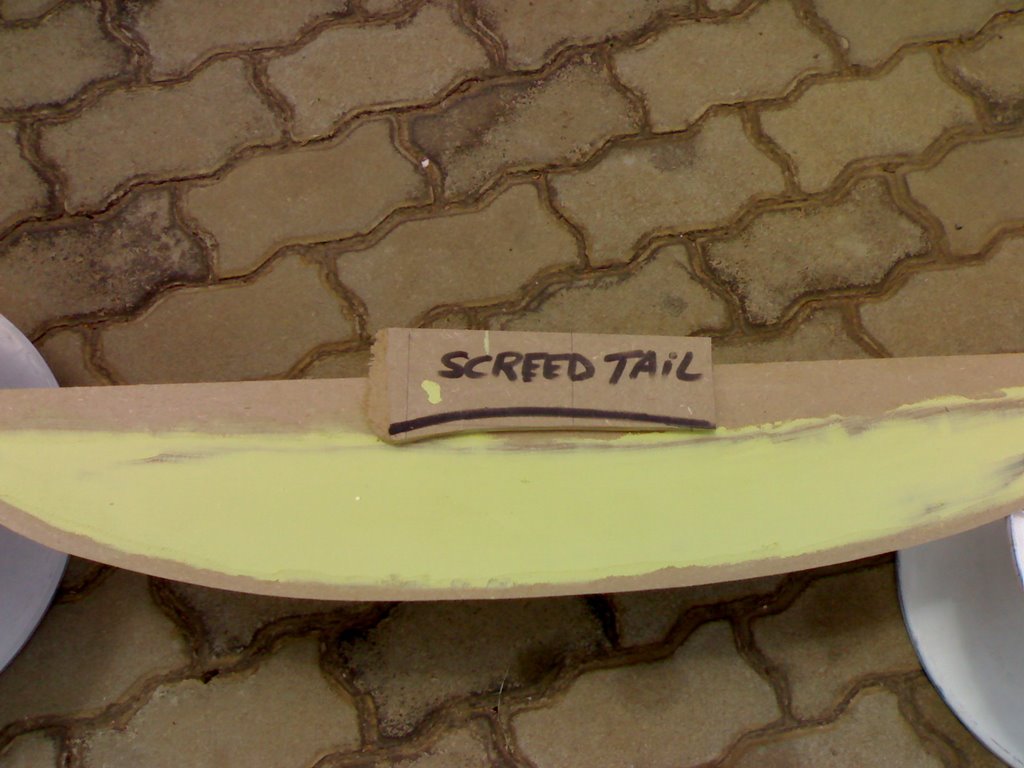
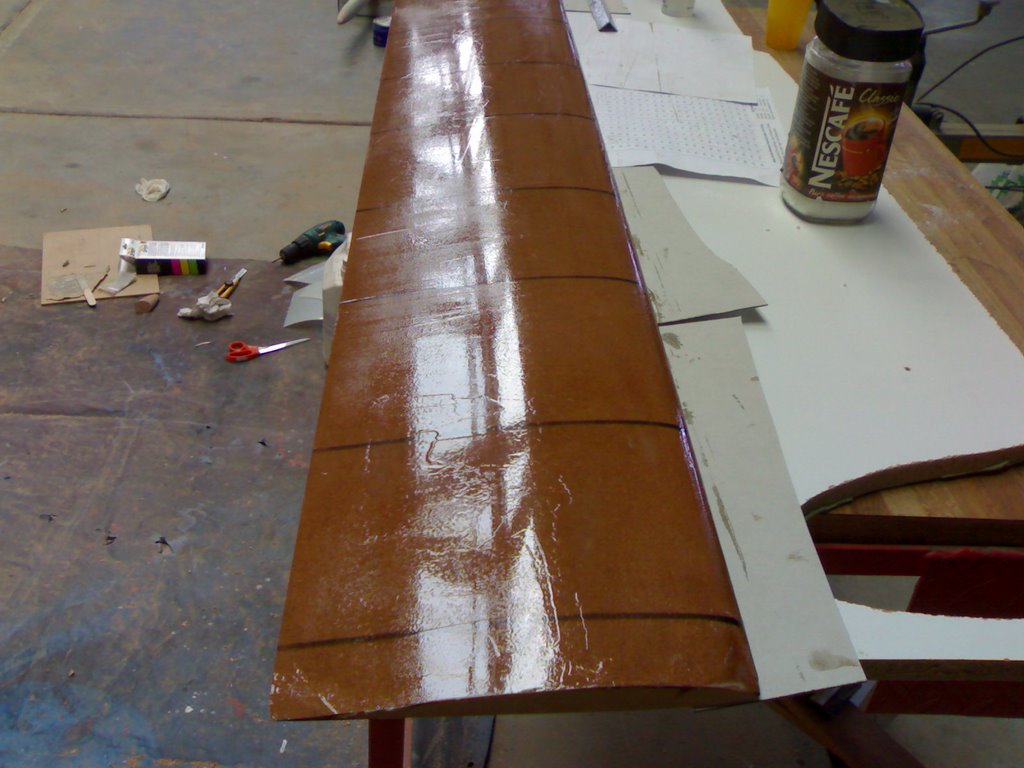
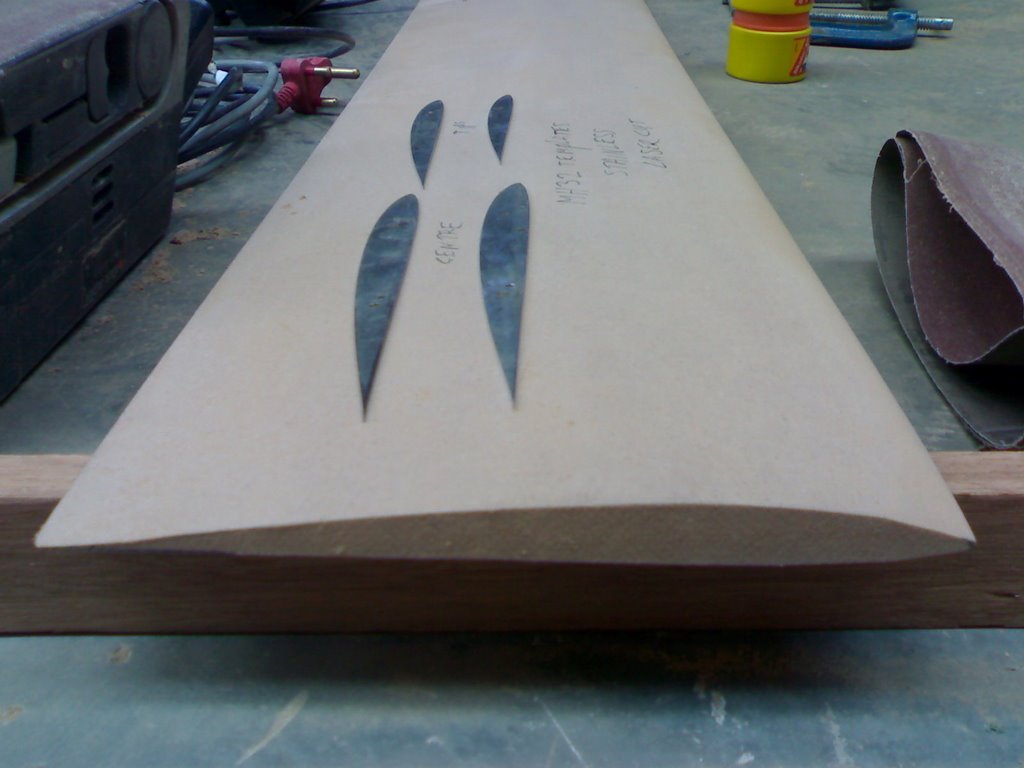
This team as you well know are really serious they have developed special tools to help them ,this one will be known as the home made pencil ----facinating.


It is used as shown to mark the splitter board vertically below the fuselage plug , very neat idea.


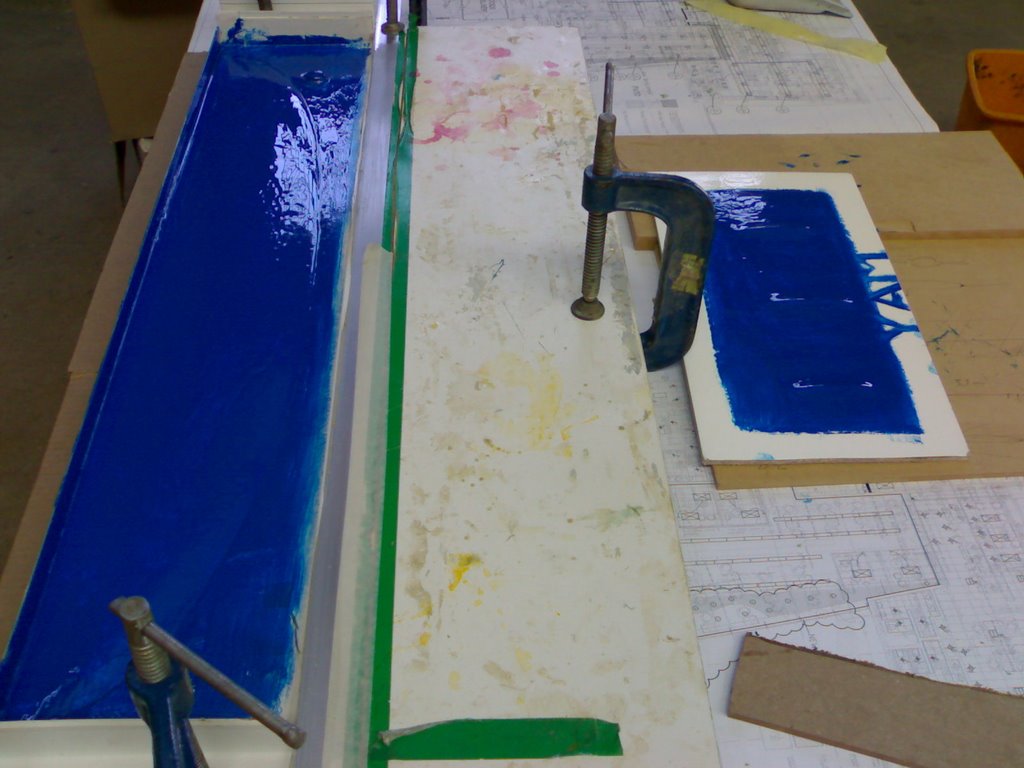
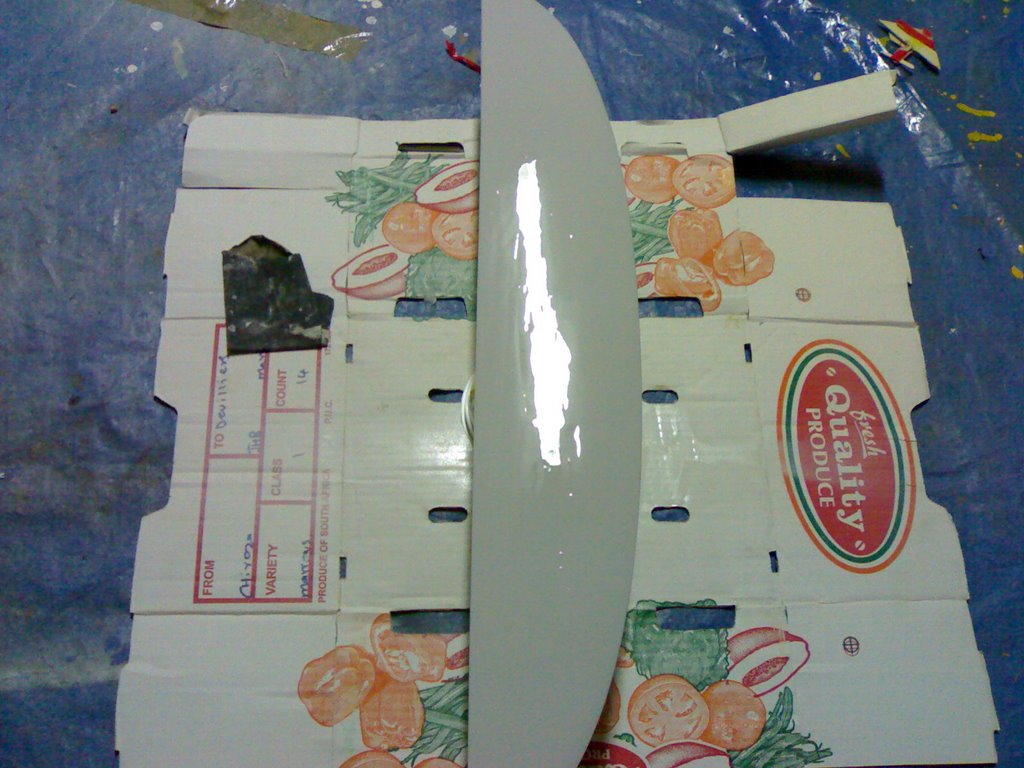
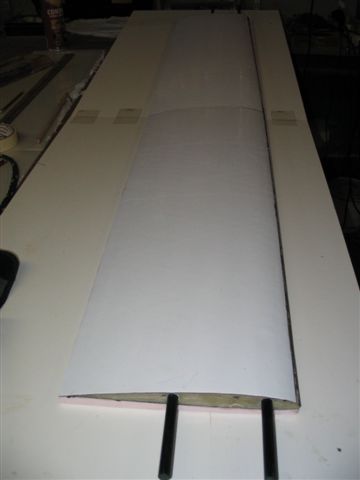
This splitter is made up of several parts ,easy to remove off the mould later.


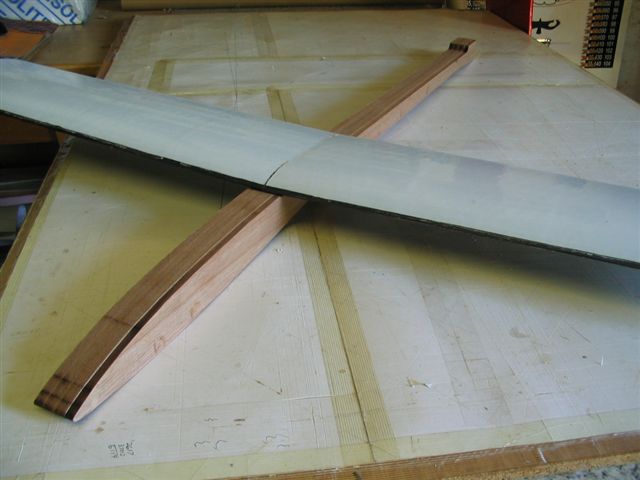
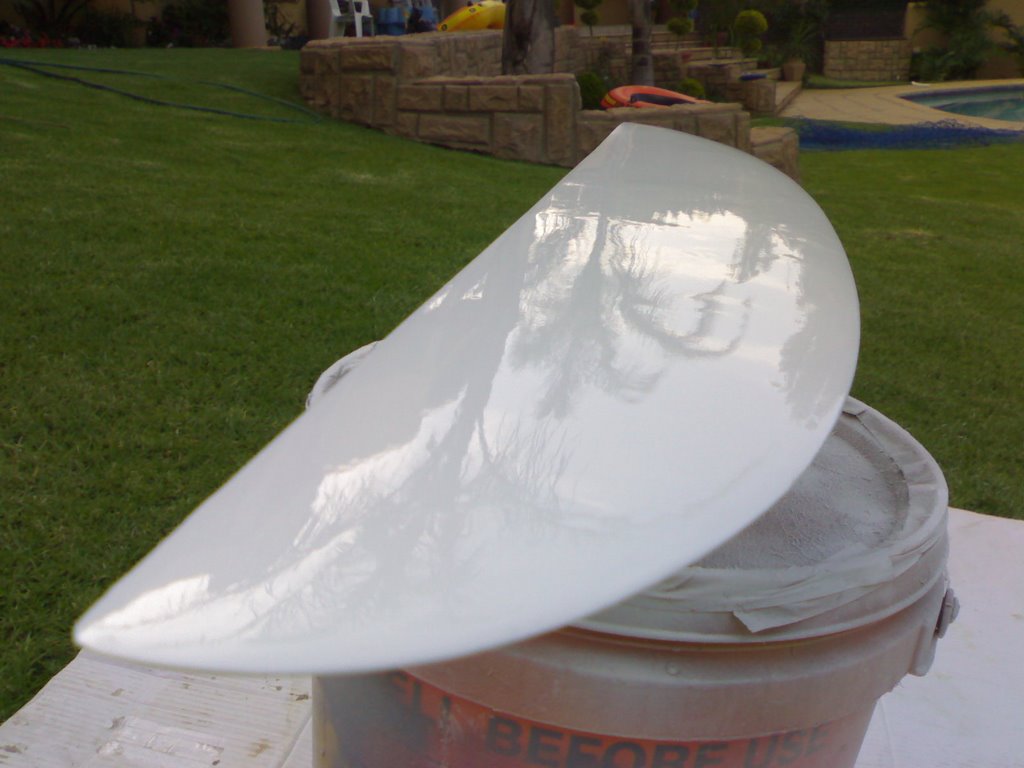
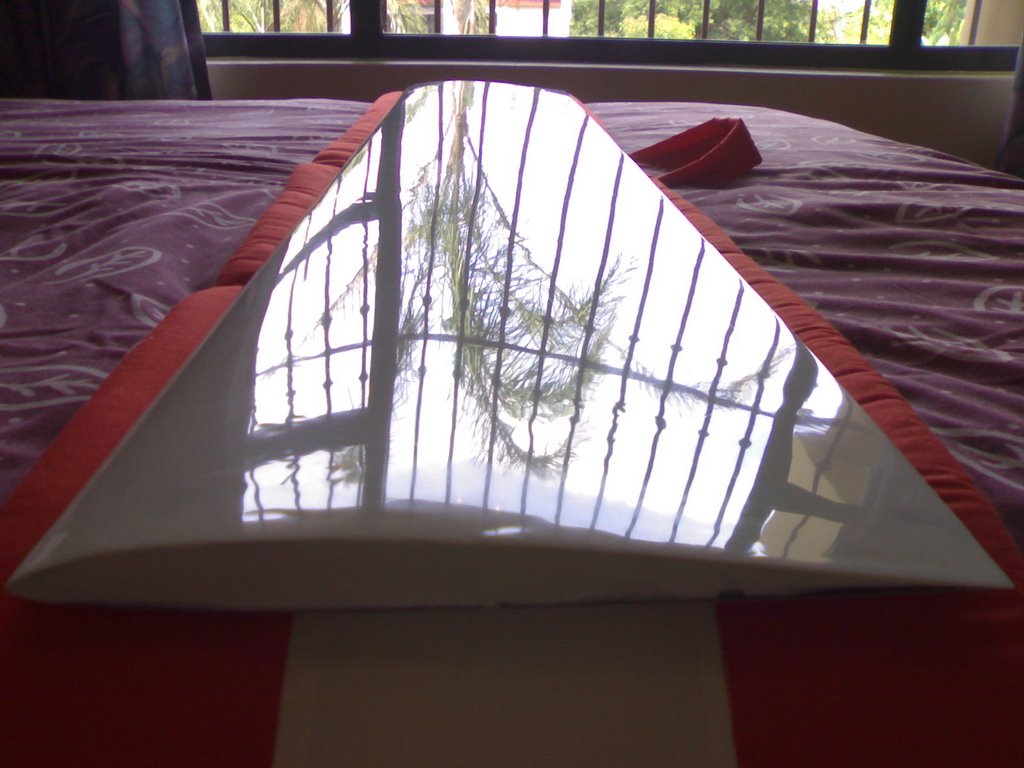
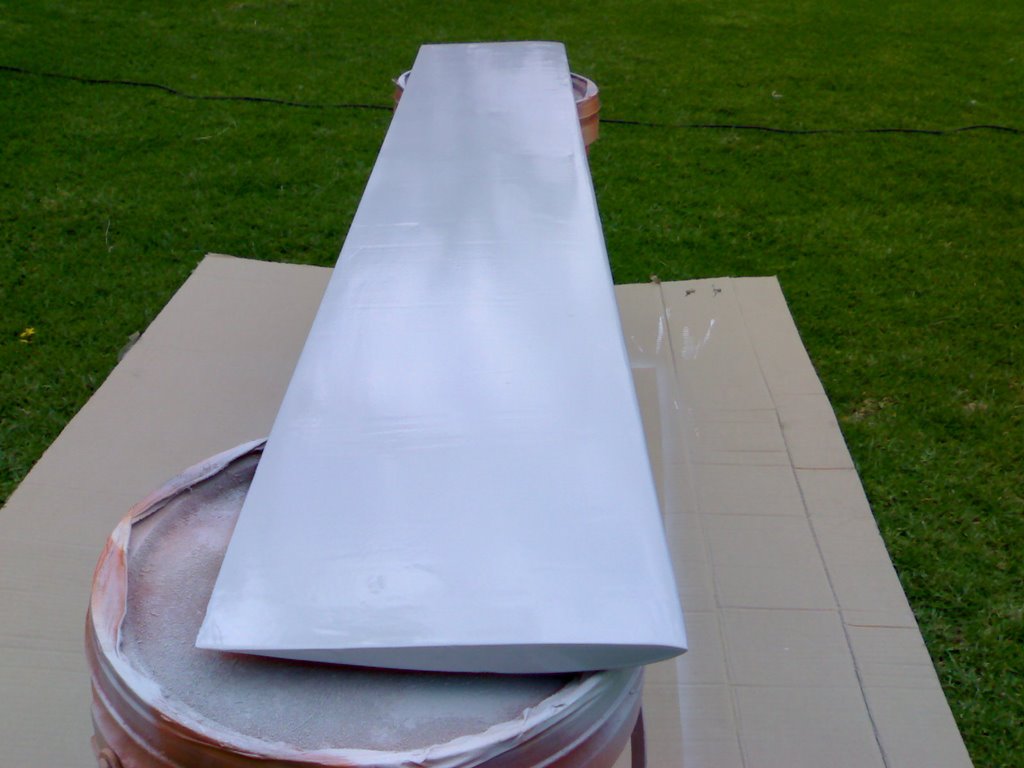
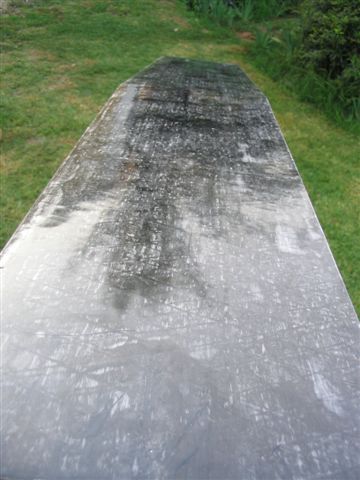
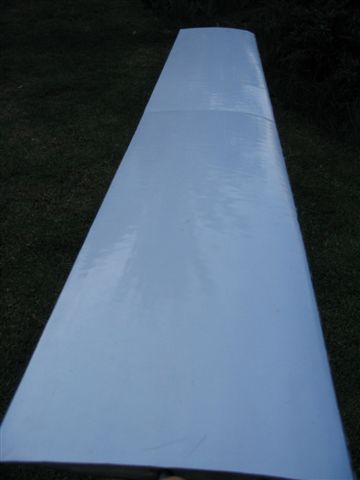
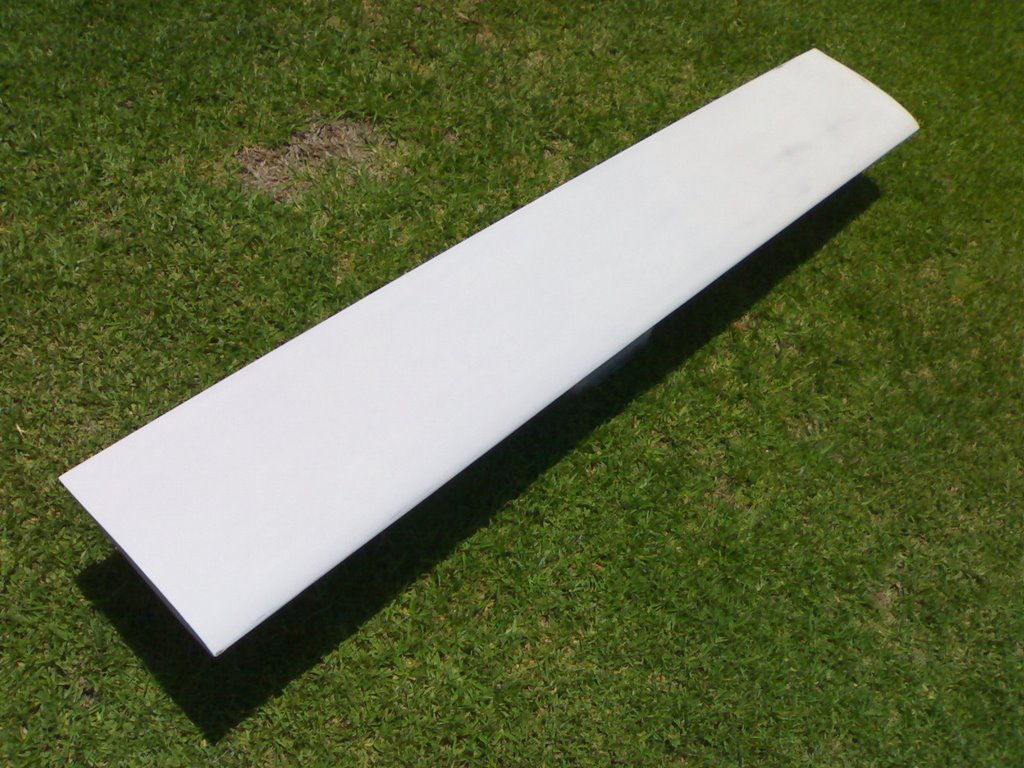
Meantime more preparation goes into the 
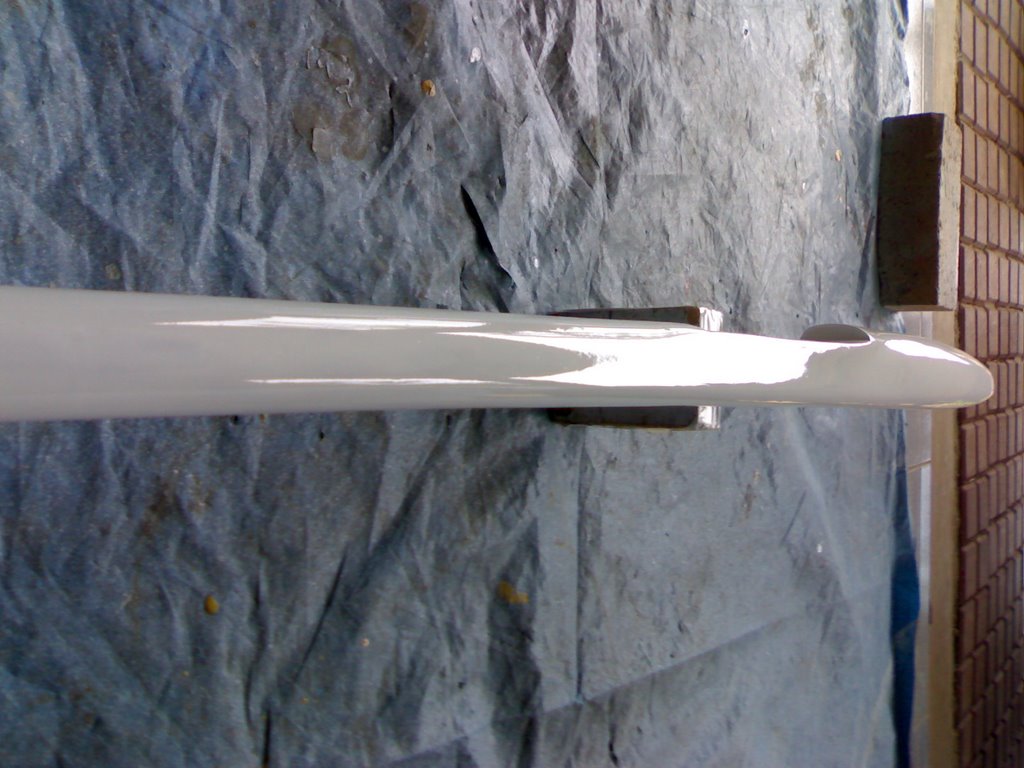
plug. This is almost ready for paint.


Keep at it , the clock is ticking.

Thursday, December 21, 2006

MODEL BUILDING THE MOULDED WAY

The normal work load has dropped off so much progress on the STILLETO project has occured, looks like the other development team is at a similar stage in there endevours.


The second half of the mould is made up against the other side, that is the splitter board is removed but not the plug/form, edges are put in place and everything release waxed , buff the wing only , lots of wax on the rest helps losen things later on.


The wing mould is now complete and will be cleaned up and the rough edges sanded off.


Its like opening a present always good when it turns out ok.


The tailplane mould had some of the tailplane left behind ,this was soaked in water and then carefully picked off a little at a time, no not with a screwdriver or modeling knife.


Now it looks good and ready for waxing up and preparation to
lay up the first tailplane .


Next we mark out and cut with a jigsaw the fuselage profile as close as possible to the line, the
fuselage is waxed and not buffed at this time to a shine, while the fuselage is set in position with ,in my case off cuts of superwood . The splitter must sit halfway and the taper towards the rear requires carefull alignment.


When done the body filler is carefully scraped into the gap and allowed to go rubbery , once again it is scraped down to an even shape as close to 90 degrees against the fuselage as you can get it, a clean up with thinners, and release wax on everything splitter included. The fuselage is now buffed up and on goes the gel coat ,allowed to gel, followed by cloth and resin, thin fine cloth first , build up a good layer as I dont build an edge on my fuselage mould( makes clean up easy later).


This will be my last posting of this glider build for this year and when I resume in the new year the prototype will probably have flown, if there is any interest in the actual layup ,materials and technique used I will document these for later.

Have a good festive season
and remember friends dont let friends fly junk.

MODEL GLIDER W.S.B. PROGRESS REPORT

Well we have been sent more spy pics from or man on the inside, one of the Westrand Spy Bereau's leading agents.


Project Emoyene is now onto futher development of their stealth technology fuselage.


Looks like it has been filled and sprayed with an anti-radar detection MS primer coat.


It's starting to look like a high perfomance R.P.G. remotely piloted glider to the layman.


More spy pics as we get them. Later dudes.

Wednesday, December 20, 2006

STILLETO WING

For a moment I thought the BERG management had pulled my licence to publish articles, but it would seem as if we have upgraded to a later version of software, so I have upgraded and can continue posts.


In the meantime the moulding of the wing centre panel has proceeded well, the first photo shows the set up of the splitter board on the leading edge and the alu channel on the trailing edge, which is attached using thin double sided tape .

The leading edge is once again sealed with light weight body-filler and when just set, it it scraped down to a sharp even line, light cleaning with thinners takes off any filler residue.End caps finish of the mould , so that it makes a rigid box shape.

I now rewax everything and buff the wing surface to a shine.

The gel-coat is now evenly applied and allowed to go to a hardened but sticky stage . Some wetted out carbon tows/resin is layed into the sharp corners, before laying up the first layers of light cloth(this is to prevent cloth weave from showing through) subsequent layers of thicker cloth are now layed up to the required thickness and strength. You can even glass in some cross members to stiffen things.


Finally I like to finish off with a label and a layer of fine cloth, this makes handling the moulds easier and covers any sharp pieces, next we will turn the mould and plug over and layup the second half.

The fuselage is prepared for moulding next time.
Cheers for now.

RSA r/c Model gliding records and rules

Uploaded to the BERG vault
pdf files on SA r/c records and rules for records.

Tuesday, December 19, 2006

Season Greetings to All our members ****************************************

The year 2006 is running out slowly but surly and new challenges will shortly greet us as we move on to a new year.

May I on behalf of The BIG BERG team whish all of our members and there families a very blessed X-mas season and a happy new year.

Thank you for your support during this year and we at BERG are looking forward to many more happy flying hours with you.

Regards
Piet.

Chairman BERG.

BERG Safety code and Membership form.

Uploaded to the BERG vault
our safety code and new membership form.

Monday, December 18, 2006

STILLETO MOULDS


Having spent hours preparing the plugs/forms it is now time to lay up our moulds . The first order of business it to wax the plug and polish it off ,several times. Next we cut out chipboard
to shape to act as a splitter board.


Now the tail is fitted and layed exactly in the middle of the leading edge on the splitter board, the gap is then filled and as the filler goes off/rubbery you carefully scrape it down flat with a wooden mixing stick. Note the marble inset into the board this helps with alignment of the moulds.


Clean up lightly with thinners, any residual filler and then rewax everything, buff up to a shine.I have built a border with aluminium channel , this makes the mould rigid and easy to lay up on later when we mould the actual tailplane. Next we paint the gel coat in with a soft brush, as thin and evenly as possible ,here you need to work with the spec sheets supplied with the product and lay the first light layers of glass cloth and resin at the right time, gel cure really speeds up on a hot day.


Next I lay up some carbon fibre tows(or some resin and flocks mixed to a paste) in all the sharp corners , this allows the fine cloth to radius
as it does not follow a 90 degree bend without making bubbles or air gaps. We now build up the layers of glass using thicker cloth to make the mould strong about 4 mm or more. This is now left for a few days ,before tuning over t

Eagle Badges


Firstly, well done to Heinrich Nathnagel on achieving his Bronze Eagle on Sunday at BERG.


There are still two weekends left this year, so if you want something to do, come and put in some flights for your Eagle Badges.

Friday, December 15, 2006

A new Skunk Works for BERG


While the 2 establish model glider manufactures at BERG are getting down to the final touches of there latest creations another Skunk works got in by the back door. In a excusive interview with the BERG blog correspondent, the President of the new Skunk works reviled there latest technologies.

The new skunk works to be known as " The Foam Snow Goose Works". The President said " We are extremely excited about what the future hold for us and at this stage we will be producing entry level gliders to the marketplace and our focus will be on quality and value for money rather than quantity".

Our first run of Zaggi's has been completed and shipping , we expect more orders to roll in as the next big slope event will be the Black Eagle meet at Volksrust in March 2007.


If you do need one or two of these extremely affordable Zaggi,s you can

email him

Thursday, December 14, 2006

MORE EMOYENE SPY PICS


Well well the heat is on, development of the Emoyene sailplane appears to be more advanced than at first anticipated. Apparently outside help has been obtained in computer cutting the fuselage profile.These guys are obviously serious .


The plug is machined from maranti it will be interesting to see how it gets rounded.


The tail end remains a mystery ,looks like a wooden bottle cap opener, but may be some kind of stealth technology.


Maybe its a tin opener or perhaps a V tail hummmm.

Tuesday, December 12, 2006

STILLETO PREVIEW


Most of the pieces are comming along fine, just for inspiration they are put together as a mock up, wing tips are not yet finalised, but the proportions look good.

Monday, December 11, 2006

STILLETO BUILD


The last post was the preparation for moulding , but common sense has prevailed and rather than rushing , it is better to mould one of the smaller pieces just to get into the swing of things. So I have decided to build the tailplane form and mould it first. The first photo shows the screed of body filler , same as the wing but following the curve(the tips will be made in a similar fashion.)


The reference lines and epoxy are applied , it is also important to seal the superwood as any water that can seep in makes it swell up out of shape.


A couple of coats of 2k finish off , of course the local insect population will also come and land on the wet surface, if they are small dont touch.


The reflections start telling a story , the reflection in this case is a neon light and you can see
the surface in not accurate, if the paint layer is thick enough I wet sand from 600 grit to 800 t0 1200 and then polish.
Look at this photo , you can see the surface is more accurate,but still needs futher finishing.


The wing is now ready for release agent(several coats of ram wax and buffing to a shine) ,check
the reflections indicating an even surface.


With the pieces starting to take shape I calculated the total cost to date at around R800 and estimate that the first product will cost about R4000 but this includes the moulds.Hope its going to fly.

BERG 2006 Old Years Eve Fly Out. **** (SUN 31 Dec)

All BERG members are invited to come and fly the year out on Sunday 31 Dec.

This year Charl has donated the braai packs. If you are going to join us please
email me so he can supply the correct amount of braai packs. We would hate to be short.


Flying will start at the usual time (weather permitting). Bring your refreshments, a good
Bottle of champagne, glider ,winch ext and come and enjoy your last flight of the year.

Friday, December 08, 2006

A Hat trick


Mathew Goodrum getting up to mischief at the recent glider clinic. He got hold of Wolfgang’s hat and car but cloud not find a chauffer to drive him around.

F3B TRIALS RESULTS


-------Original Message-------

From: C. Flee
Date: 12/07/06 21:43:40
Subject: F3B TRIALS RESULTS

Gentlemen,
please find attached the results of the F3B Trials held at Eastern Thermal Busters on Saturday 2nd December 2006.

Evan with your and the rest of the committees approval may I announce the that the 2007 RSA Team for the F3B World Championships in Switzerland will consist of Craig Goodrum, Michelle Goodrum and Dion Liebenberg. First reserve being Paul Carnall.

Best Regards,
Charles S. Flee
P.S for the BERG TEAM placing s see XL spread sheet in the BERG vault .
Regards
Piet.


Wednesday, December 06, 2006

BERG Vault created

To view large word files and pdf’s, for downloading forms ext the BERG vault is now in operation. As a test you can find the MAP to Tony's farm here as well as the word document.

To go to the BERG vault click on the BERG vault link in the side bar and then on the file that you want to read or download.

You can also do same if the word BERG vault is highlighted, just click on it.

For more information you can email Tony

STILLETO WING PART2


After sanding as accurately as possible I draw on some referance lines which help visually , we now screed the surface with ZAP finishing resin and aerosil/microballoons paste, use a long smooth piece of plastic if you can.


Another round of sanding with an orbital sander,
takes it down to a smooth finish .


Once the screeded shape is close to the profile shape , it will be sprayed with a spray filler, this has a harderner and flows over the surface also filling hollows. At this stage the superwood is well sealed and you can sand with 360-400grit wet paper on a long sanding block.


A couple of 2K coats of paint start finishing of this panel , by now the final polishing is all thats required , before moulding. Care must be taken not to damage the fine trailing edge.
The next posts will cover the start of the moulding about a week from now.

EMOYENE SPY PICS


Once again we are being allowed in on the secret development of this high performance prototype, the pink foam wing cores have now been bagged and the wing is taking shape.


From studying the photos it appears as if no spars are used, but the strength comes from the uni-directional carbon fibre skin.


Interesting is the apparent di-hedral break built in during bagging by using a hindged building board ,sneaky clever.


So what can we learn about building gliders fron these photos, tradional balsawood built up construction still has its place but it is slow and not as strong as the composites, foam cores bagged with epoxy glass is stronger,possibly more accurate , can handle the winch and can be built as a one off, to test flight characteristics. The last method is the fully moulded ship also composite construction fairly quick once you have moulds,light accurate and strong, models can be accurately replicated, a bit more expensive to make due to moulds.

Directions to the Vaal Dam ( Tony Roberts invitation )


Tony Roberts have extend an invitation all BERG members to join him and to fly your gliders at his farm near the Vaal dam ,Oranjaville, during the upcoming holliday. This will take place form the 2 Jan to the 5th Jan 2007.

You are welcome to contact Tony to confirm with him if you would like to go or if you need more information.

The directions can be found in the BERG vault. Thanks Tony.

Tuesday, December 05, 2006

STILLETO WING


We left off last time with the shaped and filled fuselage, ready for spraying, now four cycles of waterpaper sanding and spraying the results are almost good enough for moulding.


Sanding is now all 1200grit wet and final polishing with burnishing compound .


Attention now shifts to the wing centre section, which is roughed out of superwood using lazercut MH32 stainless steel templates for the profiling.


The wing panel is carefully marked on the leading and trailing edge and checked for accuracy, it now really pays to work on a flat surface, and use a straight edge.
The initial work to be carried out, is to now remove the templates and route or plane down as carefully as possible to the profile on each end. The templates are re-attached and using your straight edge , scrape across the (dusty) surface, the high spots will show up, work these down and recheck. Finally I sand with 100 grit and a belt sander to a smooth shape.


The trailing edge should look dead straight as well as the leading edge (marked lines) an error here can lead to a warped wing, the next post, we will sand slighty under the profile and start screeding back up to the correct size. Sounds difficult but only took one afternoon,
more later.

Monday, December 04, 2006

Glider clinic a great successes.


We had a reasonably good turn out on Sunday and the weather turned out to be windy all day long. Craig gave us some valuable input on how to read the air and the use of indicators of lift.
At the berg field the grass is reasonably long this time of the year and Craig gave us a practical example of this and how to use this to "map out" the surrounding area and track thermals
as they passed over the field.

Later on Evan used his Makuklu with Craig as his caller.
All in all a nice relaxed day after Saturday’s F3B qualifier.

Thanks To Craig and good luck with the preparation for the WC in 2007.