Because this Blog is updated regularly it is a good idea to visit at least once a week so as not to miss anything. If however you are not a regular visitor, please use the archive links, at the bottom of the side bar on the right, to view postings that have moved off the main page. Or type a key word in the search block in the black bar at the top left and click on "SEARCH BLOG" and it will take you to the posting within our Blog. (For instance, type "Jart" and all the post that mention Jart will open) The Label at the bottom of a post can also be used. Click to get all posts with the same label together!
This BLOG is best viewed at a screen resolution of 1024x768. Click here to get instructions on how to adjust your monitor to these settings.


Wednesday, January 28, 2009

HTL #1 ETB

Lionel and Jochen look on while Rodney guides Trevor in on timeThe BERG camp: Peter and Piet winding up for the next roundAfter Mike’s furiously fast Celstar repair job postings and Michel’s impressive ASW28-18 teaser, it’s time to take a minute to relax, grab a beer and catch up on some HTL happenings.

Sorry this report is a little late but my blogging seems to be running a bit behind due to work commitments and family stuff (also got a kid’s 21st birthday coming up) all getting in the way.
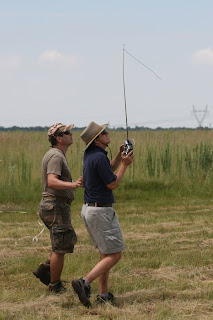

Rudolph guiding Gert to the landing areaPaul timing and spotting, Izak flyingWell, the first leg of the HTL was held on Sunday 18th Jan at ETB. A good idea to move it later into January as it probably resulted in the surprisingly large turnout of 9 teams (three from ETB) with 27 entrants arriving at the field to get their first leg scores in on a perfect highveld summer morning.Rudi flying, Evan timing and spotting

The host club had the farmer mow a large patch of grass for us and their organisation was outstanding. A novel concept was introduced where almost every round had a different CD, the task being taken on by one of the ETB members that weren’t flying the round – and even juniors had a go at CDing a round or two. A little confusing at first but they pulled it off well and there were no problems.

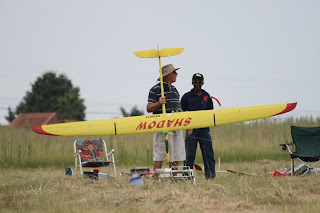
The three ETB teams preparing for the start of a round
Trevor about to launch for SimonConditions were overcast and wind was non existent to light while setting up. It strengthened for the first two rounds and then swung 180 degrees for a while before settling to light and variable in direction for the rest of the day. Cumulus clouds developed early in the
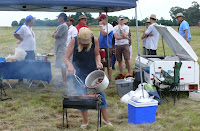
Martie finishing off the cooking while the hungry start queueing for lunchday and gave us really challenging conditions – thermals tended to be fairly well defined but light and small. We just managed to finish and get packed up before the first rain drops started coming down on us.

Notable for this first leg of the HTL was the large proportion of 2 meter entries and Craig’s request to have a single flight of 10 minutes with a 2 meter model scored for open and normalised against the 6 minute fliers. This allows a 2 meter contestant to fly open and score in both open and 2 meter classes with one flight. Interesting, and may even work.

Lionel launching Craig's FlingPiet ready to go with his 2.5m Tsotsi, Peter timing


Open Results were Chris Adrian first, Craig Baker second and Trevor Austen third. BERG team results were Piet in 9th place, me in 10th place, Peter Joffe (Tsotsi not flying well at all) coming in 23rd. Some of our members such as Gordon and Jochen were placed in other teams. But then since the closing of the MMS field and their members flying at the BERG field and Evan moving over to the East Rand, I’ve kind of lost track of who flies for which club. But it really doesn’t matter – when we all get together it always results in a great flying day. In fact, how about the organisers of one of the HTL events throw random entrants together into fun teams - could be interesting?

In the 2 meter class I managed a third with Dion Liebenberg second and Alan Smith first. For the full results and Lionel’s round by round report, pop along to the MGA blog (link on the right hand side panel).

Tuesday, January 27, 2009

New Project "Igazi"


This is a new Project. Got the wings cut by Craig Baker, very thin profile, 50 cm wingspan. as a wing reinforcing method, due to the thin section, I thought of using 6x2 flat carbon strips. Routed out a small opening (pick 3) then insert the carbon strips vertically (pick 1) and glue in place with Gorilla Glue, the glue remains rubbery and expands slightly while setting, though filling all the gaps neatly. Further I intend using a 55 diam ducted fan assembly pushing approx 1000 gr thrust, +-45000 rpm with a 2100 3s LiPo battery.

Monday, January 26, 2009

New ASW 28-18 from Germany


After a long period, nearly 2 years of waiting, I have received my new ASW 28-18.

Wingspan 6 m
Fuselage in Kevlar
4 piece wings with winglets all carbon
Flaps
Ailerons
Spoiler
Retract wheel
Retract motor with single propeller
Tow coupling for aerotow
in total 13 servos

Celstar Finishing

Saturday was time to line up the wing joiner system, which in essence is two tubes in the wing and a tube bonded into the fuselage. The joiner is a smaller diameter ali tube which slides through and can be removed. It gets its strength from 32 x 60k carbon tows which are wet out and pulled through, the smaller tube is about 14mm dia. This system has worked well on gliders up to 4 mtrs and handles even winch launching (this was tested yesterday at BERG with the Diana 2).

As the wings were rebuilt the new end ribs of ply needed to be bonded on and aligned. The wing roots are nowhere near to parallel with the fuselage sides.


The ply end ribs are cut out and a hole made to fit over the joiner tube, then using balsa and foam wedges, the rib is aligned with the fuselage and tacked in place with Cyano glue. A mix of resin, micro balloons and cotton flox is used to fill the gap and as shown the wings now match perfectly.


The root and tip ends get a layer of thin glass/resin for strength and this will also be sprayed white the rest of the wing l be covered with ORA-COVER in this case.


Some finishing touches such as decals and registration numbers and the canopy white is applied. This plane now requires the tailplane and control surfaces set up as well as cockpit detail and its good to fly again.

Almost done.

PS. Kobus thanks for the offer of commercial canopies but for scratch builders half the fun is learning how to make stuff yourself.

Saturday, January 24, 2009

Found at BERG field

We have found a Mini-Receiver 35 MHz Module, with a 35.150 Christal on the BERG field. Would please the Owner Identify such receiver, type, color and markings and we will be glad to return the item to the rightful owner.

Thursday, January 22, 2009

Celstar Canopy

The weather and various factors sometimes make it difficult to work on the big pieces, so we then tackle the smaller detail parts that go to make up a scale glider.

The canopy had to be molded and after making a foam/glass plug. I bought some expensive UDI acrylic clear sheet 1mm in thickness for the canopy this cost me R289 per mtr x 600 wide.

Anyway long-story-short our first attempt with Peter and Charl helping to pull this over a plug while I heated with a heat gun failed when the material split just before the final shaping had been reached. Back to the drawing board, and back to my plastic's supplier for some more material. This time I purchased some interlid PVC clear sheet in .5mm thickness and costing R19.40 a mtr x 600. This stuff moulds easily and on the second attempt managed a good quality canopy. Also at this kind of price is easy to make a few and experiment.


The canopy frame is made from some pieces of ply epoxied together on the fuselage for a good fit.


The relacement TV remote came in this packaging and I thought it could be used as an Instrument binnicle for the CELSTAR.


It was duly waxed and a layup of off cuts used to make the shape, it was cut and fitted to the canopy frame which has been beefed up to minimise flex, it has the rounded shape I was after.


It will make a similar replica to the full size instrument binnicle which is rather sparse of instruments.

The canopy tray needs filling, sanding and spraying, then some instrument detail and finally the clear pvc canopy bonded on. The pilot and his seat will be a seperate section fitted into the cockpit.


The wings need sanding and ply root ribs and then a covering of white Oracover.


Cheers for now.

Monday, January 19, 2009

Celstar wings

Here are a couple of photo's of the wing rebuild. The wings are now all sanded and the skins repaired.

A.
The shear web grove is cut out and a 3mm ply shear web cut to size. The wing joiner tube cut out is made and the alu tube test fitted. The cut out in the ply for the tube is for alignment not strength , that comes from the carbon tows. The alu tube is rough sanded to give a rough surface for good adhesion.


B.
A mix of epoxy, micro balloons and cotton glass flox is used to bond in the shear webs, tubes and ply strip fillers. The pair of wings with the joiner are lined up
and clamped on a flat board until cured. As this is a tapered wing this is done upside down which will impart a slight diherdral.


C.
After it has cured the wings are seperated and the top groove sanded out with a dremal, down to the shear web/ply.


D.
The Carbon tows are cut 2 x long to go out past the servo bay (another weak point) 2 x medium and 2 x short 60k, the top and bottom are the same no of carbon tows.


Thats it for now. Filling, sanding, end ribs and recovering next.

Thursday, January 15, 2009

Celstar rebuild moving right along

The Celstar fuselage is prepped for spraying and I have masked out and sprayed the blue band and the red pin strip. I found a tin of very old blue 2k from one of my bikes, must be about 15 years old but not hard. I should have mixed some with harderner and done a test first but I dont have the patience, so I sprayed the blue, which did not flash off as expected and I thought I would have a big problem with curing. Fortunately overnight it cured and has a lovely shade of deep blue and gloss finish.


The stripes are masked over and the white 2k sprayed the results are pleasing, next I will recover the rudder with solartex and spray the orange on the fin and rudder, the lettering and registrations have been cut from vinyl and after application the whole fuselage will be sprayed with a high gloss clear coat.

Hard to see where the repair join is.


The red stripe was masked using a plastic tape from a automotive paint shop 5mm wide and can be stretched/curved and leaves a sharp paint edge.

The wording Flying Springboks under the canopy will be replaced with the word Celstar.


The canopy mould is screeded with a micro balloon mix and will be water-papered smooth. No paint until the clear canopies have been formed.

The new servo tray needs to go in but this will only be positioned if the clear canopy comes out ok and I go with a full scale cockpit.

More progress pictures next week.

Tuesday, January 13, 2009

Celstar Wing Rebuild

I have started stripping and repairing the damaged wings. These wings are made with normal expanded poly-styrene foam cores skinned with an obechi wood sheeting and bonded on with a layer of glass and epoxy resin.


On removing the covering it is clear as to why this wing failed . Under load the wing flexes and in the case of a loop the bottom skin is under tension and the top skin compression. The greatest load in normally found just after the joiner tube and this drops off exponentially with very little load at the tip. Generally when laying up carbon tows as spar caps we try match the loads and would typically lay more tows in the first quarter then in steps less and less tows until the tip. A big change in structure/material strength is normally the place where things break.

This wing failed under stress because the only thing holding the top skin apart/together is polystyrene. I will route out a groove and install a lite ply shear web and a new set of carbon spar caps. A new aluminium joiner tube will be installed, easy as this wing is flat. Also note the wiring was installed in a tube made with drinking straws and this will need to be replaced. I will install a piece of fishing line through this tube as a pull through.

The damaged area is cut out and a new piece of foam glued in with 5 minute epoxy.


A rib template is tacked on and using a hot wire bow the wing core is cut to the original shape. A little sanding and a new piece of balsa skin is epoxied back on and clamped until set.

Both sides and some new leading edge needs to be done, next I will tackle the smaller wrinkles at the tips, sand everything down and cut through the wing for the shear web which will go out about 1 mtr with the joiner tube.


In the meantime the canopy form has has been layed up with 3 layers of 163gr glass and epoxy. As usual the foam was covered with packaging tape to aid easy release.

Thank you. Any questions please feel free to ask.

Monday, January 12, 2009

Time for a build thread

Actually this will be a rebuild thread, and I will attempt to cover my methods used to put a crashed glider back into the air, in hopefully better condition than before.

During our recent slope outings Ken from JOMAC had the misfortune of crashing his Celstar GA-1 glider after it's one wing folded, fortunately he dutifully cleaned up the crash site and collected all the debris. On inspection the wings were damaged, one quite badly where it had folded and some impact damage on the tips. The fuselage was in three large pieces and crunched on the nose.

I asked Ken if I could have the pieces, to which he agreed as long as he could strip out the fittings, linkages, servo's etc. Ken has a mould so he can build another. I, on the other hand don't. But the Celstar would be nice in my collection, being designed for aerobatics, and built in Ermelo.

The Celstar was successful in the 1991 world aerobatics champs and two remain registered for flying to-date, one in Switzerland and one in the U.S.A. ,the third one is still in South Africa but apparently requires some work. I managed to find very few photo's of the original, but there is one nice shot of the South African one in the old orange/red and blue SA airways colour scheme which I will respray it in.

Always recover a crashed plane with all its pieces, on closer inspection and after the dissapointment dies down, a viable repair is often possible.

Here are the basic steps to repair:

1.


I have cyano-ed all the pieces back together and added some sika-dur epoxy outside across the cracks for support.


2.


The inside is sanded clean of paint,and any steps or sharp edges. I tackled this with my power sander and ate away some of the canopy lip by mistake, this will be repaired.


3.


Next I lay up some squares of 163gr cloth and epoxy on a mylar sheet. Once it's wet out I tranfer it to the inside of the fuselage, across the breaks.

I could just reach the area behind the wing, I press it against the inside surface and add more pieces until the whole tube/break is repaired.


4.


AHHH Carbony goodness...... some 60k carbon tows will beef up the undercarriage and canopy lip as well as breach the front damaged areas.

The off cut Hybrid cloth re-inforces the join and adds some strength, the canopy lip is being re-built with glass and a mix of cotton/glass flocks and resin.


5.


The clear canopy was totally destroyed so a new one is carved/sanded from blue foam and will be layed up as a form for a new clear canopy and a sprayed black one as a spare.


6.


The outside of the fuselage has been wet sanded after filling with a resin/micro balloon mix and once all the holes are gone and the shape is correct. It has been painted with an etch poly-urethane filler/primer. This primer and the old paint will be water papered with 320 grit paper and prepared for the masking and spraying of stripes first and then the white.

Thank you, wings next.